![]()
![]()
![]()
Tag: handmade
Now that I have more free time (it’s a long story which I will not go into), I started knitting again. I finished up an old loop scarf and now I’m making a few teddy bear sweaters. I was never really a fan of teddy bears, but suddenly, I can’t help myself. It started with Build-a-Bear. I took out my old CamoBear when I started thinking about our move next year, and what I will do with some unloved plushies. I already started clearing out some small unwanted stuff. Anyway, back to topic, I took the teddy out, and I instantly dressed him in what clothes he had. I even checked out the German Build-a-Bear website and found some cute outfits, including the German national football team outfit. Want!
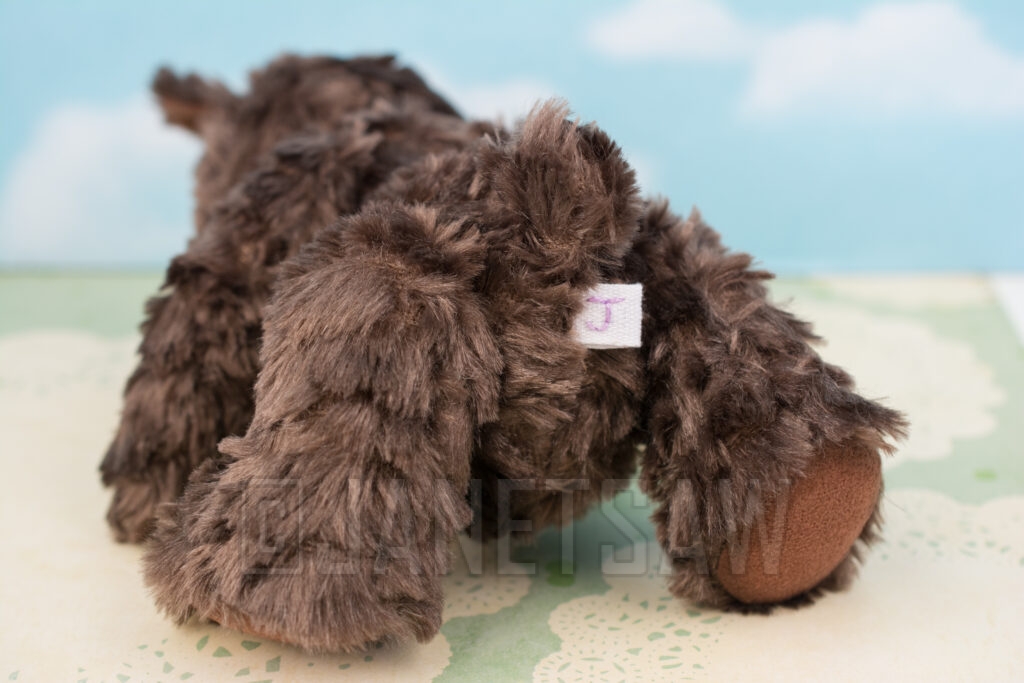
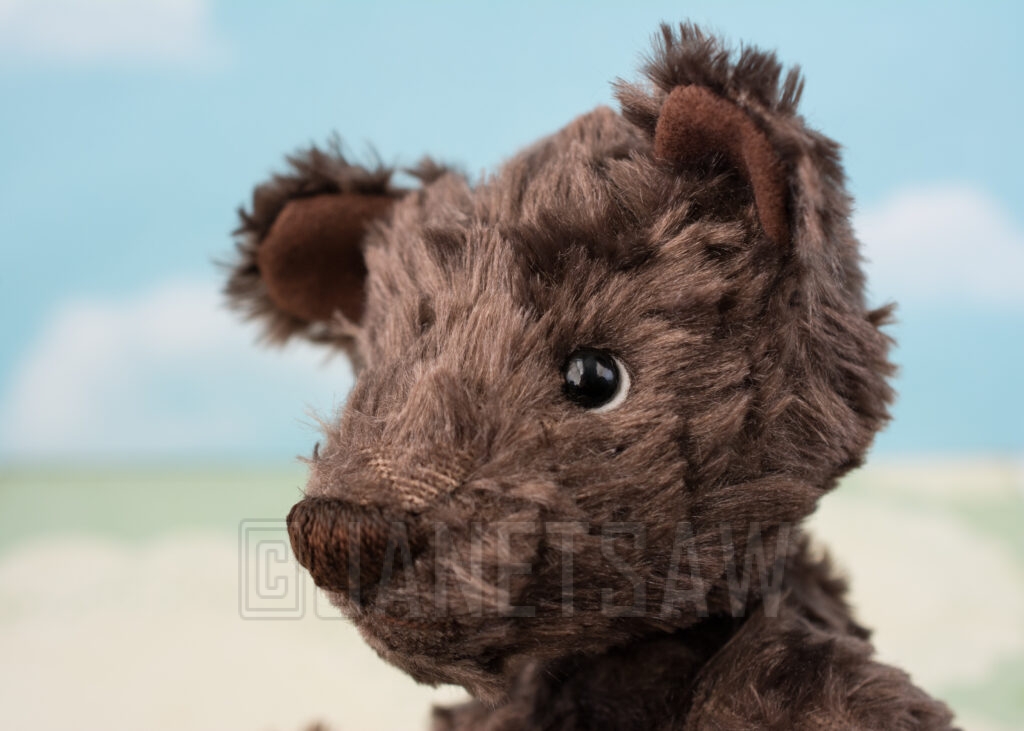
Within a week, I had bought 3 teddy bears (!!) They were from varying brands: One pre-loved purple Build-a-Bear, one white Aurora teddy and another all the way from Australia by Minkplush, called Norman. Here he is:
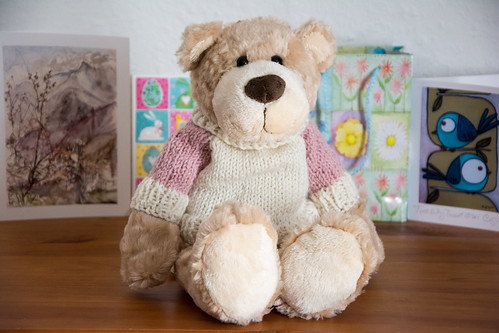
I really wanted to clothe them, especially the ones from other brands. I straight away knitted a sweater following a pattern from Craftbits.com. It’s meant for a 14” bear, but I only have 13” or 16” bears. Nevertheless, the sweater still more or less fits 13″ Norman bear. I used 4.0 mm needles for the rib stitch and 4.5 mm needles for the stockinette stitch. I followed the pattern exactly, except for the neck band, where I picked up all the live stitches and did one round of stockinette, though I should not have, and then I knitted only 5 rows of rib stitch instead of 6. I used Jeny’s surprisingly stretchy bind-off. This stretchy bind-off is the best I’ve ever tried. It is a bit bulky, but the benefits outweigh that small negative point.
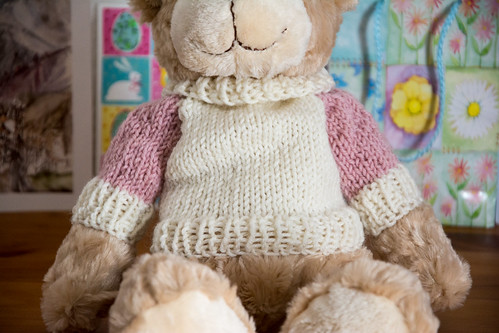
The pink knitted portions look quite uneven, because I unravelled the yarn from another project, and I suppose the kinks are to blame. I’m already starting the next sweater in finer yarn, so maybe someone else in my menagerie of plushies will be clothed soon.
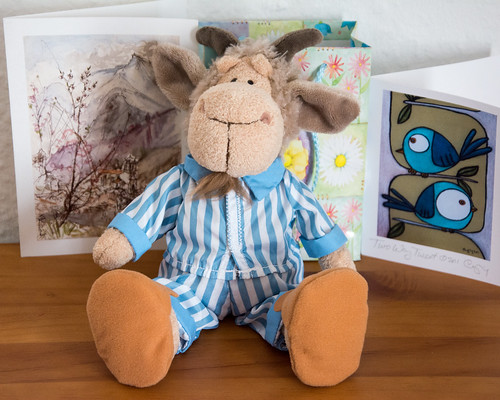
Plush toys with clothes are all the rage right now — at least to me! This Nici Jolly Gustav is wearing a set of pyjamas with bedroom slippers from the Nici Dress Your Friends range. I’m hopeless at sewing when I need to make my own patterns. Perhaps I’ll try it one day.
It’s the new material I’m working with lately. Instead of cutting and bending thick, hard wire and soldering, I just carve it out of a block of modelling wax and then send it to the casting company. It saves me money because I don’t have to buy precious metal in advance. Wax is a lot less dear should I make a mistake.
I’m currently making rings for myself, while I figure out the intricacies of carving, casting, setting and finishing. I wouldn’t want to sell products before I was ready, would I? 😀
Here are some behind the scenes photos:

The left one is actually my wedding ring! (it will be a little larger in size than I should make it, but I’ll be wearing it on my right hand)
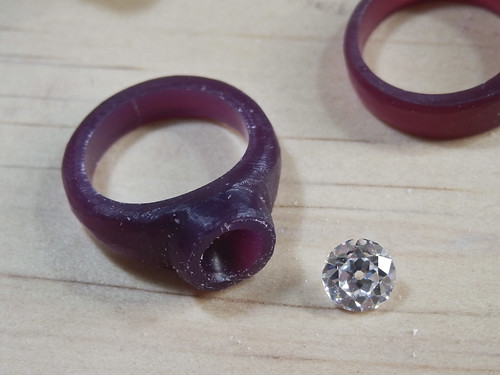
This ring is still in the works. I modified it since this photo session. It will hold the Old European Cut stone also shown.
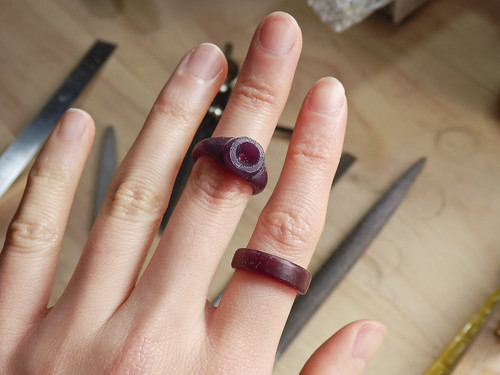
Here I am trying them on. My finger size is a bit smaller than the pre-drilled holes that wax ring tubes come in, so I don’t even need to enlarge the hole. For some designs, I may need to carve the ring from a solid block of wax instead of using ring tubes.
Purple wax is my favourite, and not only because of the colour! 😉 I find that it doesn’t clog up my bench files and isn’t gummy in texture. I have used blue wax which is softer than purple, and I don’t like it as much. BUT pink wax is the WORST ever. Being a novice, I tried to carve the gummy wax with my wax file and it clogged up to the point where I had to dig out the wax bit by bit with a piece of copper, since using a metal brush didn’t work. Don’t make that mistake, because it will take you an hour to fix up the mess.
More updates on my projects soon to come.
I now have a Flickr Pro account! I can now blog faster and embed my photos so I won’t have to upload them. Hah. I should have done this a lot earlier.


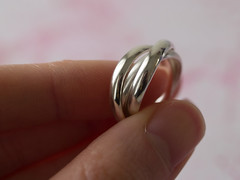
Project 2: Russian wedding ring. So, the rings come from wire. The wire has a D profile shape. They are cut into the right lengths, then bent up and the two ends must face each other flat. This makes the ring an odd shape, but not to worry. After soldering the joints, the rings are hammered on a mandrel to make them round. Then two of the rings are cut open again, so they can be interlocked and re-soldered. Once that’s done, the rings are cleaned up by hand.
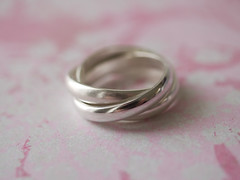
Left image shows the ring, hand sanded to remove nicks and blemishes. I have also sandblasted one of the rings to give it a texture. The right image shows the ring complete, after being polished in the vibratory tumbler for about 2 hours. It looks so flawless. Only I know where the flaws are! lol.
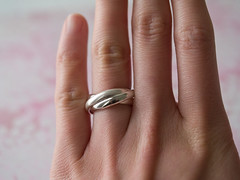
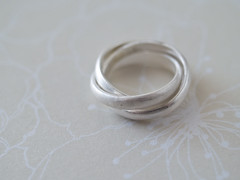
So shiny! Fits great, but I must admit that I wanted it just a tiny bit larger, to fit on my right hand ring finger during summer. Next time, I’ll add 1mm to the wire lengths. Rings are very sensitive and my measuring was not perfect.
I’m so terrible with blogging! As usual, I only blog when there’s something big. Anyway, on to the show.
As the title suggests, do you ever wish you could see some of my polymer clay jewellery in person? Now you can! A selection of my work will soon be available for purchase at Ballyhoo Art in Geelong, Victoria, Australia.

They also stock a whole range of paintings, decorations, jewellery and accessories made by other Australian artists. It’s exciting to be chosen. Perhaps they may even distribute my work to other shops in Australia if all goes well. This is a great start for me and I’m really happy about it. If you’re ever in Geelong, make sure to drop by Ballyhoo Art (90 Ryrie St, Geelong 3220).
I’ll provide more updates on when exactly my items will be released and the RRP for them. Stay tuned!
I started my metalsmithing jewellery class 3 weeks ago, and at first I hated sawing metal. It was hard on my hands and I felt it was very messy and dirty. After 3 lessons, I’ve finished my first project, a brass brooch. Now I can say that I do enjoy it for the most part. It’s rewarding to have a piece of jewellery completed. It looks easy, but believe me, it takes more work. I believe it took me 6 hours to make this, a lot of the time is spent on filing and using different grades of sand paper to even out straight lines and curves. I hope I can make more at home when I have the equipment.
Anyway, on to the photos.


I love the sandblasted texture. I even put it on the back. The pin was once shiny, like a regular brooch pin back that’s glued or sewn on. I thought this would be the best finish since I can’t do this myself at home. I may be able to make a piece into a high polish if I get a rotary tool. The class uses a polishing wheel. It’s huge, and no way I could ever afford one!


It wasn’t easy to refine the curved holes. They’re still a little wonky. Luckily sandblasting hides many of the flaws. 🙂
The next project is a silver Russian wedding ring. I’ve taken some work-in-progress pics this time, and I’ll continue to do so until I finish the final piece. Not sure what the last project will be. It could be a bracelet.
I know this is really late. I realised I have not blogged about my short glass beads class. The beginners class was two months ago, and I was the only student (it was wonderful to be the only student). Beads were made and I have been wanting to buy equipment to start making my own from home, but still waiting on the return of our rental bond so I can use some of that cash. I’ll be able to make beads for my own use, but to sell, I will have to anneal them first. My instructor has an annealing service. I think it was $10 per batch + postage.
Some photos:


These were from the first day of the class. Very simple stuff, but I had some trouble getting the right amount of glass for accent dots.


Second day’s haul. Lots more complicated beads, but also more fun to make. I liked making raised flowers.


Difficult! I had trouble with making the heart shape. It’s really hard to keep the bead warm and constantly moving, while you are also trying to make a shape or pattern. My barrel beads turned out terrible, but I flattened the scenic one on the left (photo on right) and it looks better.
I still do want to make more and practice, but it’s such an expensive hobby! After getting into Blythe, it sure isn’t easy to save money. I’ll also be starting my metal-smithing short course in May. The course runs for 8 weeks, 3 hours per week. That should be interesting too! I can’t wait to solder, and then I can do this at home with a crème brûlée torch. I can’t wait to combine this with my polymer clay jewellery and also with glass beads.
Honestly, way too many treasury and collections. Nevertheless, I’m thrilled that so many want to feature my art. I should have a separate page just to contain these. Anyway, ArtFire is testing a new feature called Collections, much like Etsy’s Treasury. I haven’t figured out how to make one, so I assume I will have to wait until it’s a released feature.

Blue/Raspberry and Tiny Treats featuring my Red Velvet Cake Necklace.

Fruity Summer featuring my Baby Pink Cake Pendant.

Purple Pleasures and Lets Eat featuring my Purple Donut Pendant.
Thank you, everyone!