It’s the new material I’m working with lately. Instead of cutting and bending thick, hard wire and soldering, I just carve it out of a block of modelling wax and then send it to the casting company. It saves me money because I don’t have to buy precious metal in advance. Wax is a lot less dear should I make a mistake.

I’m currently making rings for myself, while I figure out the intricacies of carving, casting, setting and finishing. I wouldn’t want to sell products before I was ready, would I? 😀

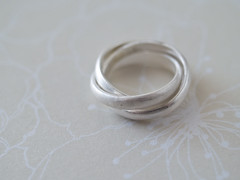
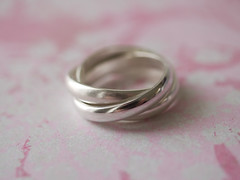
Here are some behind the scenes photos:
Rings in progress
The left one is actually my wedding ring! (it will be a little larger in size than I should make it, but I’ll be wearing it on my right hand)

Wax ring prototype
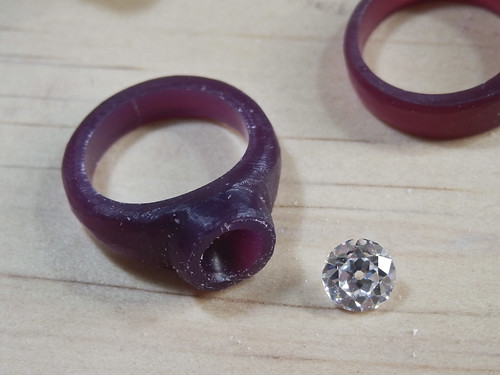
This ring is still in the works. I modified it since this photo session. It will hold the Old European Cut stone also shown.

Trying on the rings
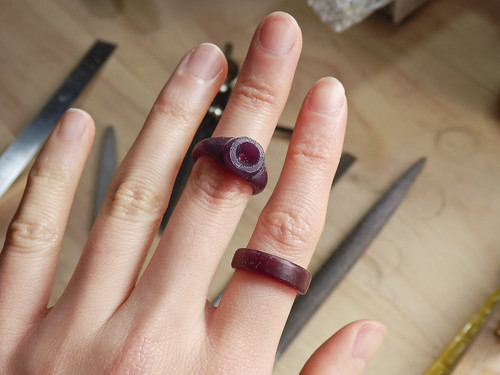
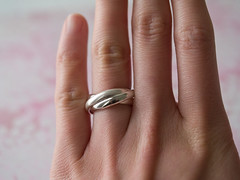
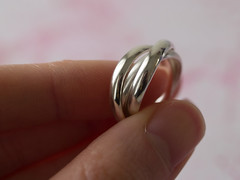
Here I am trying them on. My finger size is a bit smaller than the pre-drilled holes that wax ring tubes come in, so I don’t even need to enlarge the hole. For some designs, I may need to carve the ring from a solid block of wax instead of using ring tubes.

Purple wax is my favourite, and not only because of the colour! 😉 I find that it doesn’t clog up my bench files and isn’t gummy in texture. I have used blue wax which is softer than purple, and I don’t like it as much. BUT pink wax is the WORST ever. Being a novice, I tried to carve the gummy wax with my wax file and it clogged up to the point where I had to dig out the wax bit by bit with a piece of copper, since using a metal brush didn’t work. Don’t make that mistake, because it will take you an hour to fix up the mess.

More updates on my projects soon to come.

I now have a Flickr Pro account! I can now blog faster and embed my photos so I won’t have to upload them. Hah. I should have done this a lot earlier.

Project 2: Russian wedding ring Soldering Rings, soldered and formed into circles Surface is still rough and unfinished Two rings cut open and re-soldered
Project 2: Russian wedding ring. So, the rings come from wire. The wire has a D profile shape. They are cut into the right lengths, then bent up and the two ends must face each other flat. This makes the ring an odd shape, but not to worry. After soldering the joints, the rings are hammered on a mandrel to make them round. Then two of the rings are cut open again, so they can be interlocked and re-soldered. Once that’s done, the rings are cleaned up by hand.

Texture Finished Russian wedding ring
Left image shows the ring, hand sanded to remove nicks and blemishes. I have also sandblasted one of the rings to give it a texture. The right image shows the ring complete, after being polished in the vibratory tumbler for about 2 hours. It looks so flawless. Only I know where the flaws are! lol.

Finished Russian wedding ring So shiny
So shiny! Fits great, but I must admit that I wanted it just a tiny bit larger, to fit on my right hand ring finger during summer. Next time, I’ll add 1mm to the wire lengths. Rings are very sensitive and my measuring was not perfect.

I started my metalsmithing jewellery class 3 weeks ago, and at first I hated sawing metal. It was hard on my hands and I felt it was very messy and dirty. After 3 lessons, I’ve finished my first project, a brass brooch. Now I can say that I do enjoy it for the most part. It’s rewarding to have a piece of jewellery completed. It looks easy, but believe me, it takes more work. I believe it took me 6 hours to make this, a lot of the time is spent on filing and using different grades of sand paper to even out straight lines and curves. I hope I can make more at home when I have the equipment.

Anyway, on to the photos.

I love the sandblasted texture. I even put it on the back. The pin was once shiny, like a regular brooch pin back that’s glued or sewn on. I thought this would be the best finish since I can’t do this myself at home. I may be able to make a piece into a high polish if I get a rotary tool. The class uses a polishing wheel. It’s huge, and no way I could ever afford one!


It wasn’t easy to refine the curved holes. They’re still a little wonky. Luckily sandblasting hides many of the flaws. 🙂

The next project is a silver Russian wedding ring. I’ve taken some work-in-progress pics this time, and I’ll continue to do so until I finish the final piece. Not sure what the last project will be. It could be a bracelet.