![]()
![]()
![]()
Category: Makings
(Scroll down for English)
Schon lange habe ich nicht auf Deustch geschrieben… Es macht viel Mühe, und ich bin echt faul. Ich weiss, dass ich mehr üben sollte, auch zu Hause. Viele Wörter und Präpositionen, die ich vorher kenne, muss ich wieder im Wörterbuch nachschauen. Ich bin nutzlos. Zum Glück erinnere ich mich noch an alle Grammatik, die ich gelernt habe.
Ich möchte nicht mehr Memebox Reviews schreiben, schätze ich, weil sie zu viel Arbeit sind. Ich habe schon aufgehört, neue Boxen zu bestellen. Ich habe viel zu viel Produkte, die ich benutzen muss! Kurze Reviews und neue Bestellungen mache ich weiter nächstes Jahr in den USA.
Ich habe aber einen neuen Memebox-code bekommen! Den könnt ihr einmal im September durch mein Affliate-link benutzen. Das bedeutet, ihr müsst ein Link auf dieser Seite klicken, bevor ihr etwas kauft.
53UF – Spart ihr $5 an einer Memebox (oder Superbox, Luckybox, usw.)
Mehr Codes könnt ihr auf meiner Memebox Deals page finden.
Meine Decke wird fast fertig gestrickt. 3 Knäuel sind übrig! Ich werde nicht alle 25 Knäuel benutzen. Der Rest kann ich für eine Mütze, Handstulpen und vielleicht einen Schal bewahren. Ich kann kaum warten, bis die Decke fertig ist, weil mir im Bett immer kalt ist. Draussen ist es noch wie Sommer, aber es ist in unserem Schlafzimmer sehr kalt. Nach der Decke will ich für mich eine Strickjacke stricken. Das wird aufregend und bestimmt herausfordernd. Die Strickanleitung habe ich schon.
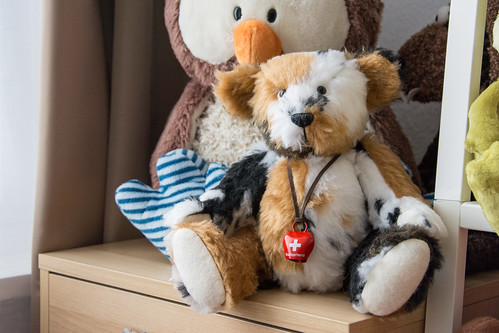
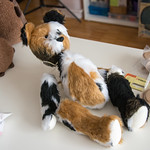
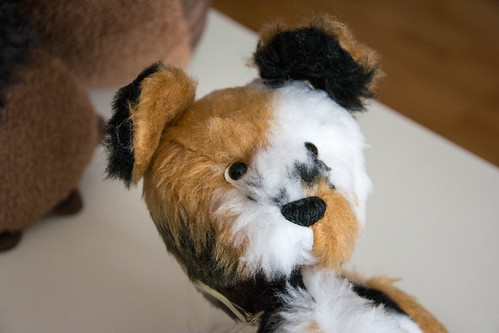
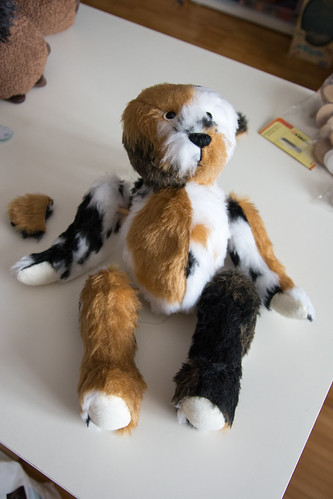
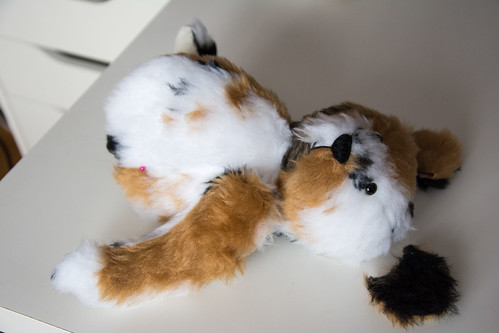
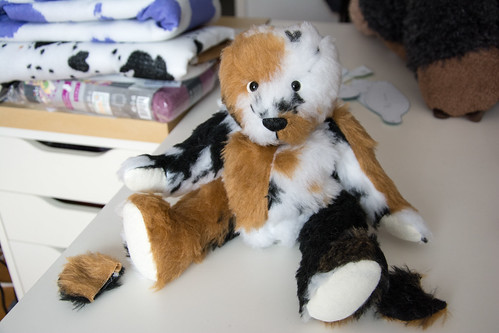
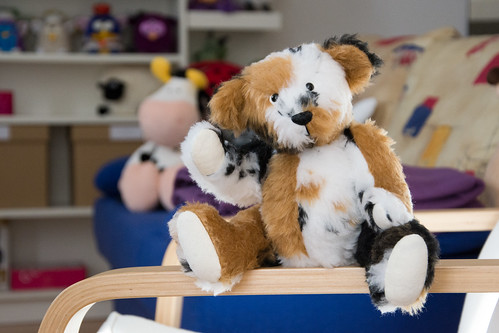
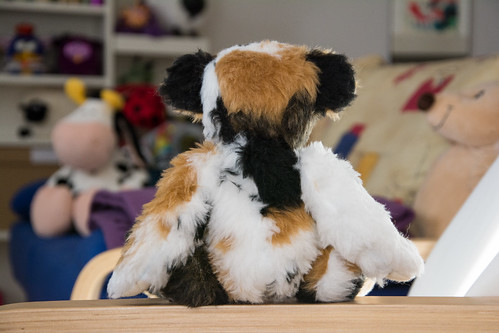
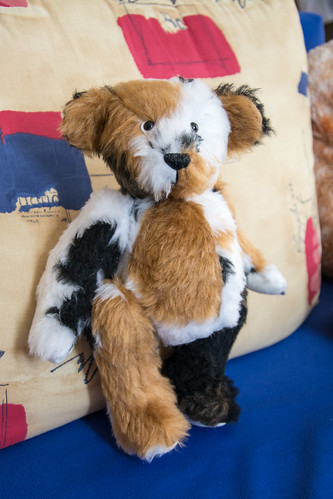
Meine beiden Charlie Bears habe ich letzte Woche erhalten. Die sind sooo niedlich! Gestern bestellte ich Bray, ein 52cm grosser Bär… ooh. Normalerweise mag ich zwar die kleineren Bären, da sie besser zum Kuscheln sind, aber Bray ist ein lila Bär, den ich haben muss!
Ok das ist alles, was ich euch erzählen kann. Jetzt muss ich alles auf English schreiben, hoi.
It’s been ages since I’ve written in German (as above). It requires a lot of effort and I am very lazy. I know that I should practise more, also at home. There are many familiar words and prepositions which I still have to look up in the dictionary. Useless. Thankfully though, I still remember all the grammar I learned.
I don’t think I will continue to review my Memeboxes, since it’s just too much work. I’ve also stopped ordering new boxes. I have just too many products to use! I’ll continue with short reviews and ordering boxes when I’m in the US next year.
Oh, I’ve also received a new Memebox code for September! You can use the code once in September when purchasing through my affiliate link. That means you have to click on one of the links on this page before ordering.
53UF – $5 off any Memebox order
You can find more codes on my Memebox Deals page.
My Afghan throw is almost done! Only 3 balls left to go, which would be 15 in total. I won’t use all 25. I’ll save the remainder for a cap/beanie, hand warmers and maybe a scarf. I can’t wait for it to be done, since I’m always feeling cold in bed at night. It’s pretty much summer during the day, but it’s really cold in our bedroom. After finishing the throw, I would love to make myself a cardigan. That is really exciting and will again be challenging.
Well that is all for now.
Bild der Woche // Photo of the week
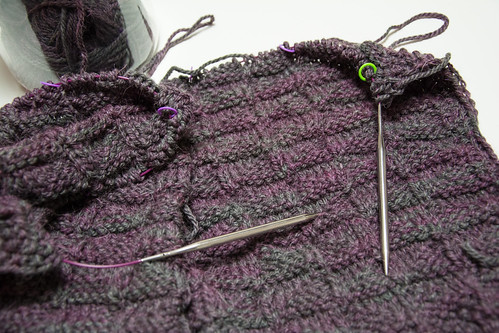
My Afghan throw, mid-way. I used a simple reversible triangle stitch pattern.
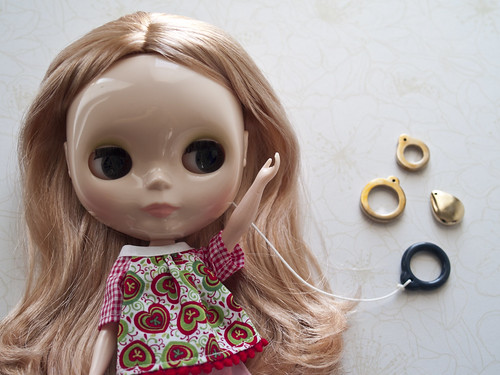
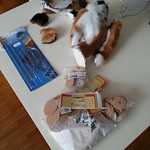
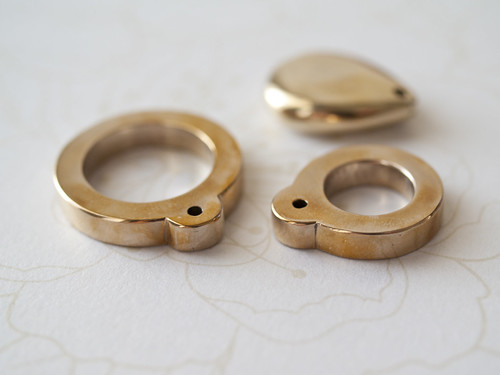
My very first project using the lost wax casting technique. I thought it would be a sweet idea to make little pull rings for these collector’s dolls.
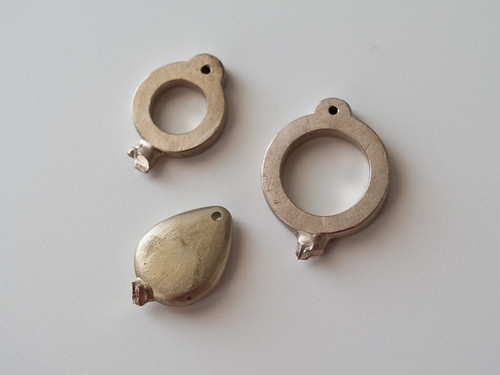
This was how I got them back. Actually cost a bomb each ($9.50), mainly for the casting service fee. I ordered the two rings in bronze and the teardrop in brass.
These were hand-carved, cast and then hand-finished to a shine.
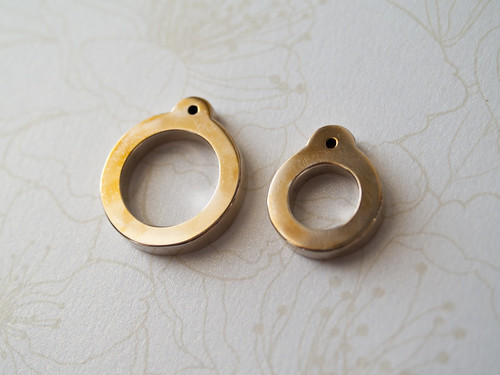
The Blythe/Twiggy inspired pull rings have a bevelled edge.
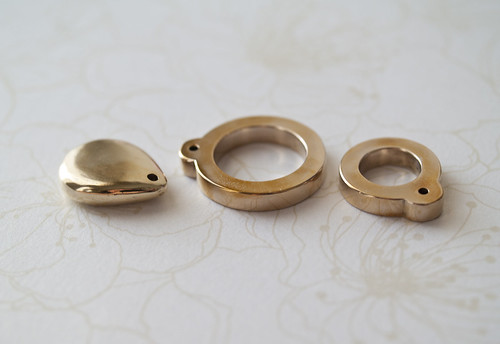
I can get these cast in brass or sterling silver (much dearer in cost). If no one’s interested, I might just give up on this. It’s not very economical unless I order more than 10 at once… but there is a very nice weight to them and they’re so pretty!
Large bevelled pull ring 7.8 grams (bronze)
Small bevelled pull ring 5.8 grams (bronze)
Teardrop 9.1 grams (brass)
I suspect brass is a tad bit heavier and denser than bronze.
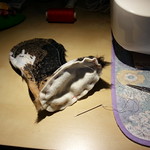
I didn’t realise Bronze tarnishes in minutes when it touches water! The first time it happened, I had it tumbled for hardness, rinsed off and I left it to dry naturally. Came back 20 minutes later and it had green spots that were impossible to come off. Back to the polishing lathe… Second go, I needed to remove the soot left by the lathe, so I popped it into my ultrasonic. After 5 minutes, I picked them out and they were like this. I give up! I’m never making anything in bronze again.
Brass and bronze come very close in colour, with brass just a bit more yellow and bronze is covered in patches of red tarnish. I had high hopes for that metal.
We’ll see if any one is interested, otherwise I’ll just make them only for myself.
You can register your interest by contacting me (see sidebar).
It’s the new material I’m working with lately. Instead of cutting and bending thick, hard wire and soldering, I just carve it out of a block of modelling wax and then send it to the casting company. It saves me money because I don’t have to buy precious metal in advance. Wax is a lot less dear should I make a mistake.
I’m currently making rings for myself, while I figure out the intricacies of carving, casting, setting and finishing. I wouldn’t want to sell products before I was ready, would I? 😀
Here are some behind the scenes photos:

The left one is actually my wedding ring! (it will be a little larger in size than I should make it, but I’ll be wearing it on my right hand)
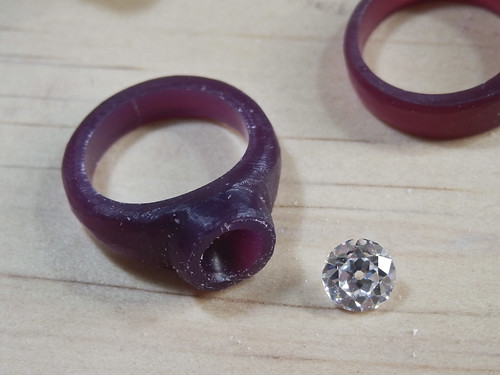
This ring is still in the works. I modified it since this photo session. It will hold the Old European Cut stone also shown.
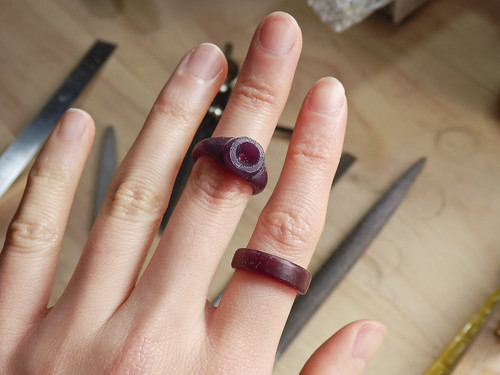
Here I am trying them on. My finger size is a bit smaller than the pre-drilled holes that wax ring tubes come in, so I don’t even need to enlarge the hole. For some designs, I may need to carve the ring from a solid block of wax instead of using ring tubes.
Purple wax is my favourite, and not only because of the colour! 😉 I find that it doesn’t clog up my bench files and isn’t gummy in texture. I have used blue wax which is softer than purple, and I don’t like it as much. BUT pink wax is the WORST ever. Being a novice, I tried to carve the gummy wax with my wax file and it clogged up to the point where I had to dig out the wax bit by bit with a piece of copper, since using a metal brush didn’t work. Don’t make that mistake, because it will take you an hour to fix up the mess.
More updates on my projects soon to come.
I now have a Flickr Pro account! I can now blog faster and embed my photos so I won’t have to upload them. Hah. I should have done this a lot earlier.


Project 2: Russian wedding ring. So, the rings come from wire. The wire has a D profile shape. They are cut into the right lengths, then bent up and the two ends must face each other flat. This makes the ring an odd shape, but not to worry. After soldering the joints, the rings are hammered on a mandrel to make them round. Then two of the rings are cut open again, so they can be interlocked and re-soldered. Once that’s done, the rings are cleaned up by hand.
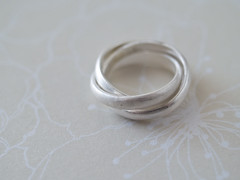
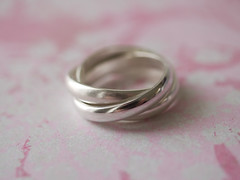
Left image shows the ring, hand sanded to remove nicks and blemishes. I have also sandblasted one of the rings to give it a texture. The right image shows the ring complete, after being polished in the vibratory tumbler for about 2 hours. It looks so flawless. Only I know where the flaws are! lol.
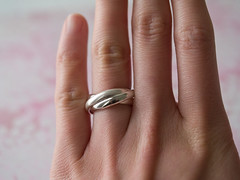
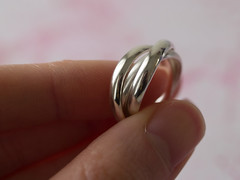
So shiny! Fits great, but I must admit that I wanted it just a tiny bit larger, to fit on my right hand ring finger during summer. Next time, I’ll add 1mm to the wire lengths. Rings are very sensitive and my measuring was not perfect.
I started my metalsmithing jewellery class 3 weeks ago, and at first I hated sawing metal. It was hard on my hands and I felt it was very messy and dirty. After 3 lessons, I’ve finished my first project, a brass brooch. Now I can say that I do enjoy it for the most part. It’s rewarding to have a piece of jewellery completed. It looks easy, but believe me, it takes more work. I believe it took me 6 hours to make this, a lot of the time is spent on filing and using different grades of sand paper to even out straight lines and curves. I hope I can make more at home when I have the equipment.
Anyway, on to the photos.


I love the sandblasted texture. I even put it on the back. The pin was once shiny, like a regular brooch pin back that’s glued or sewn on. I thought this would be the best finish since I can’t do this myself at home. I may be able to make a piece into a high polish if I get a rotary tool. The class uses a polishing wheel. It’s huge, and no way I could ever afford one!


It wasn’t easy to refine the curved holes. They’re still a little wonky. Luckily sandblasting hides many of the flaws. 🙂
The next project is a silver Russian wedding ring. I’ve taken some work-in-progress pics this time, and I’ll continue to do so until I finish the final piece. Not sure what the last project will be. It could be a bracelet.
I know this is really late. I realised I have not blogged about my short glass beads class. The beginners class was two months ago, and I was the only student (it was wonderful to be the only student). Beads were made and I have been wanting to buy equipment to start making my own from home, but still waiting on the return of our rental bond so I can use some of that cash. I’ll be able to make beads for my own use, but to sell, I will have to anneal them first. My instructor has an annealing service. I think it was $10 per batch + postage.
Some photos:


These were from the first day of the class. Very simple stuff, but I had some trouble getting the right amount of glass for accent dots.


Second day’s haul. Lots more complicated beads, but also more fun to make. I liked making raised flowers.


Difficult! I had trouble with making the heart shape. It’s really hard to keep the bead warm and constantly moving, while you are also trying to make a shape or pattern. My barrel beads turned out terrible, but I flattened the scenic one on the left (photo on right) and it looks better.
I still do want to make more and practice, but it’s such an expensive hobby! After getting into Blythe, it sure isn’t easy to save money. I’ll also be starting my metal-smithing short course in May. The course runs for 8 weeks, 3 hours per week. That should be interesting too! I can’t wait to solder, and then I can do this at home with a crème brûlée torch. I can’t wait to combine this with my polymer clay jewellery and also with glass beads.