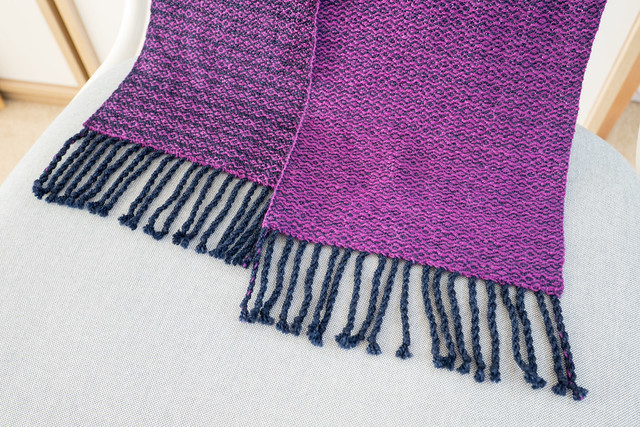
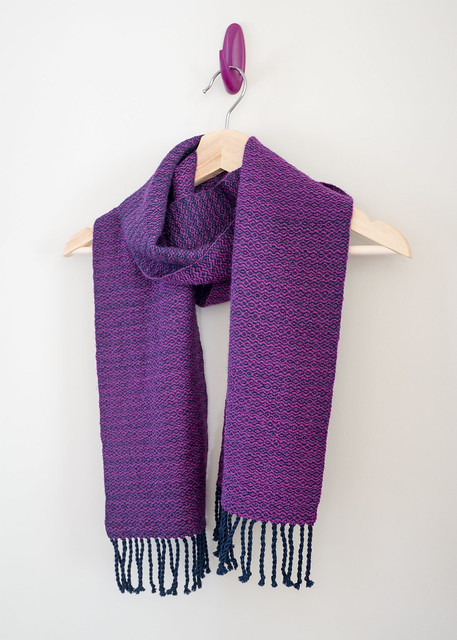
While I hope to be able to draft and sell some patterns one day, I’ve decided to give my first one away for free!

Handwoven scarf in purple and navy

This scarf weaving pattern contains  all the charts you need and details on how I wove it. The document is not suitable for those who have never woven before — it assumes you have woven a few items and that you are familiar with your loom. I have, however, added some tips just in case you aren’t familiar with the methods that I’ve used. You may like to do things differently, and that’s fine too.

Requirements: 4-shaft loom, 9 inch weaving width, 10-dent reed for 20 epi
More details are in the PDF.

Since this pattern is available for no cost, I ask that you use it to make items for yourself or for gifting only. As it’s also my first pattern, any constructive criticism will be accepted, but please be courteous.

Finally, here is the link to download the PDF: Warm and Stylish Twill Scarf Pattern

Handwoven scarf in purple and navy

Raspberries are really difficult to make, and it doesn’t make sense to make each one individually. I now have a solution for all of you budding food miniaturists! I have come up with a relatively easy way to make flexible raspberry moulds out of silicone rubber, and I am now able to provide the moulds to everyone. I am also going to explain how I use them, because they aren’t as straight forward as other silicone moulds because of the small size of the cavities.


First off, these moulds are US $3.50 for four raspberry cavities. If you prefer a mould with eight cavities, the mould will be US $6.20, currently by request (sample mould is shown in a photo below). Eight is considerably harder for me to make into one mould, and uses more silicone, but it’s easier to mould with especially if you have large hands and fingers. Plus, you can make more raspberries at one go. These moulds are currently available on Artfire and Etsy.


Each raspberry is only 2-3mm in size, which is actually really tiny. This is why you sometimes see part of the raspberry that bubbled. It’s not always easy to get a perfect one, but at this size, you won’t be able to see the faults once you use them in your miniatures.


I use coloured Fimo liquid clay and a toothpick to fill the mould. When filling the mould, try to do it slowly and put in the liquid in small amounts at a time, as this will reduce the likeliness of air bubbles blocking parts of the cavity. It helps to poke it gently to release air bubbles. Please don’t poke with force, or you will ruin your silicone mould! If you have a fine piping nozzle, that may help get the clay in, but I only use a simple toothpick, and it works for me. Also, try to fill your mould just slightly above the hole, so it makes a little curved dome. Not too large a dome, but just enough to make it easy for removal once baked.

Once you have filled all the cavities, place the entire mould into the oven. The mould can definitely withstand the 110 degrees Celsius for 30-40 minutes. Be sure to bake it no less than 30 minutes, because it will be a lot stronger and less likely to break off, if baked at the right temperature for more than 30 minutes. When removing the raspberries, I bend the mould slightly, like as if I were trying to pop the raspberries out. You will find that it won’t work, but keep it slightly bent and use a toothpick to gently pry the raspberries out, once you have loosened them from bending the mould.


Voila! Tiny raspberries!
It’s normal to have some parts break off and remain in the mould (as shown in the image above), as each beady texture is about 0.5mm, and therefore… really tiny! You can just refill the mould as usual the next time, and the remainder may come off the next time you bake a fresh batch of raspberries. I recommend using only the same colour clay for each mould. If you would like to use different colours, use separate moulds for them, since small bits are bound to be left in the moulds.

I have also tried just pushing in regular polymer clay, non-liquid, and the results are promising! You can also use this normal method if you prefer. I would still bake them together in the oven, simply because the raspberries may distort when you pull them out unbaked.

What can you do with these raspberries? Make red velvet cake with raspberries and blueberries, of course! They look great once given a nice coat of glossy varnish.


*Disclaimer: I cannot be held responsible for what you do with your mould, should you choose to buy from me. My methods are guidelines only, and you should adjust them to suit your own circumstances.

I’ve been re-photographing most of my items that I think are worth it. I wanted to update my shop because sales were zip! I had used the same props and decor in all my photos, and I was getting tired of how washed-out and lifeless they looked. The real success started with my purple cupcake, where I used a bright pink background and decreased the depth-of-field. This created a blurry background. I suppose the chain in the photo added more interest, especially when blurred out.


I didn’t photograph some of my old stuff, as I no longer have some of the originals. But I’d say they are only 3-4 items. I got a few sales since I updated my photos, which is certainly a good sign. I’ll now show you how ugly my old photos were, compared to the new ones.


I think the photo on the left does not do my product any justice. Makes it look dull and boring. I re-photographed it on a postcard. I must say that my macro lens does help a lot with close-up photos. It’s really good for miniatures. I do have trouble photographing larger items like my homemade lightbox (which I will talk about in a separate blog post). I can’t zoom at all with this macro lens, so it’s cumbersome. For these large items, you’re better off with a normal, multi-purpose lens.


Oh my… Look how ugly that cake is. Compare that to the new photo! I think it looks 100 times better now. I used scrapbooking paper for the background, and the same miniature plate seen in old photos. One other tip, I don’t bother so much with colour and exposure when I take photos, because my camera is quite old and DSLR technology wasn’t as great 5 years ago. I don’t fiddle as much by saving the images as RAW files, and then later do the editing on my computer. With RAW images, I can crop, adjust white balance, contrast, and increase exposure till my heart’s content. When taking photos, it’s more important to get the right angle and make sure the image is in focus. Those are the things you can’t edit with RAW files.


With this update, I tried to adjust the angle and positioning of the items. It’s important to get them into a pleasing position on your background, and make sure your light source is hitting the item at the right spot. I also chose a background that doesn’t clash with the colours of the item. I think the overall look and feel is quite pleasing, compared to the old photo. I do sometimes make the mistake of choosing a background that blends too much with the item. The photos then go unused. I usually re-photograph till I am reasonably happy.

Here are some examples of scrapbooking material that I use as backgrounds. They are cheap and available everywhere!


Other ideas to try would be wrapping paper, postcards, printed photographs, books and magazines. I also used a recipe magazine for some of my close-up photos… and I don’t cook. At least the magazine is not wasted then! I managed to find some pages with nice coloured areas. The best thing about photographing miniatures is that you can put them up to most patterned backgrounds, and still not be able to tell what the backgrounds are. Here are some photos with my cooking magazine:


The blue patterned background is actually from a photo of a meal on a plate. And for the cherry pie, I used a photo of an icing cake with pink flowers. There are a couple of concerns regarding using magazines and books for close-ups. One, make sure you don’t reveal too much of the background to be recognisable, or it could breech copyrights. Two, you can see all the printed coloured dots from being too close. I don’t mind these too much, since most people view thumbnails when finding items, and the dots are not noticeable then. It’s a small price to pay for using your own magazines and books, since they are the cheapest means possible.

I hope my long post has been helpful, in some way! Next time, I will talk a bit about my home made lightbox, although I still have yet to use it. I always just wait for morning, and leave the lightbox for emergencies.

All the items pictured are available from my stores on ArtFire and Etsy.